............................................Welcome To Grandma Bonnie's Closet.............................................
Showing posts with label vegetables. Show all posts

Thursday, April 18, 2013

5 Tips To Help Make Your Vegetable Garden A Success

By now you might be able to guess I am anxious to get my vegetable garden going. I have been scouring the Internet and reading all my gardening books for all the best tips in growing a great  vegetable garden. I figured as I am working on my garden I would share the information I found with all my gardening friends.

1. Save all your egg shells for your garden soil. What I do is crush the egg shells in to small bits and add it to my garden soil. This will give a boost to your vegetables. I also throw a handful into the holes where I am planting my tomato plants. This will help prevent blossom end rot.

2. Sprinkle a hand full of coffee grounds around your vegetables. The coffee will slowly release nitrogen which is very beneficial to your vegetable plants.

3. 1 tsp of Epsom salts and 4 cups of warm water sprayed on your plants will produce a boost in fruits in about ten days. Now this I have not tried. I have sprinkled Epsom salts on the soil around my plants. I will try this tip and see how it goes.

4. I found this on Pinterest. DIY plant food. I am going to try this.

Mix 1 cup coffee grounds, 2 crushed egg shells, 1/16 oz. ammonia, 1 cup water, 1/8 tsp Epsom salts. Stir well. Spoon this around the base of your flowering plants, except African Violets.


5. One last tip. I am planning to use this watering method with some of my vegetable plants. I found it on Pinterest of course.

Last years photo of the Mini Farm Sustainability Project. I am lending the same raised beds this year to their project. We can't wait to learn more from their gardening techniques.
I hope you will be able to benefit from some of these gardening tips. If you have any great tips to share please leave them in a comment. Happy Gardening.

Saturday, April 13, 2013

My Garden Planner

It's that time of year when everyone is planning their vegetable garden. With dreams of beautiful vine ripe tomatoes turning their rosy red cheeks up to the sun. I do need to get out doors and get my hands in the dirt. Although it is still cold out there is something we can all do now while we are waiting for the weather to warm up a bit. We can plan our garden on paper. Most every gardener does their planning differently. A few years back I was the type of gardener that just bought plants and seeds. Planted them in the tilled soil, watered, weeded and hoped for the best. Some years I did better than others but over all my garden did poorly. For the last few years I have been putting more effort into my garden and a large bounty of fresh vegetables has been my reward.
First off I plan my garden out on paper. Did you know that some vegetables have friends and other vegetables have enemies. Well, not really enemies but their called antagonists and friends would be called companions. While planning I first read the package instructions. How much sun and room do the seeds need to grow at their best. Is the plant a cool season vegetable or do they need to be planted after the threat of frost has passed. Then I check a chart I have that will tell me which plants I want to place each vegetable beside. I use this chart so I do not plant enemies together.

For example:
The Tomatoes plants companions are basil, borage, carrots, celery, chives and dill. The antagonists for a tomato plant are beets, cabbages, fennel and rosemary. 
You can find that chart here.

Then I make a graph of my garden. I plan out each section carefully. making sure tall plants do not shade vegetables that need full sun. I try to plant water loving vegetables on one side and those that do not need watered every day on the other end.  I think you have got the idea. This year I found a garden graphing tool on line. It was easy to use. Just put in your garden size click on the vegetables you want on your graph and drag them where you need them. Then print the graph. 
You can find that tool here.

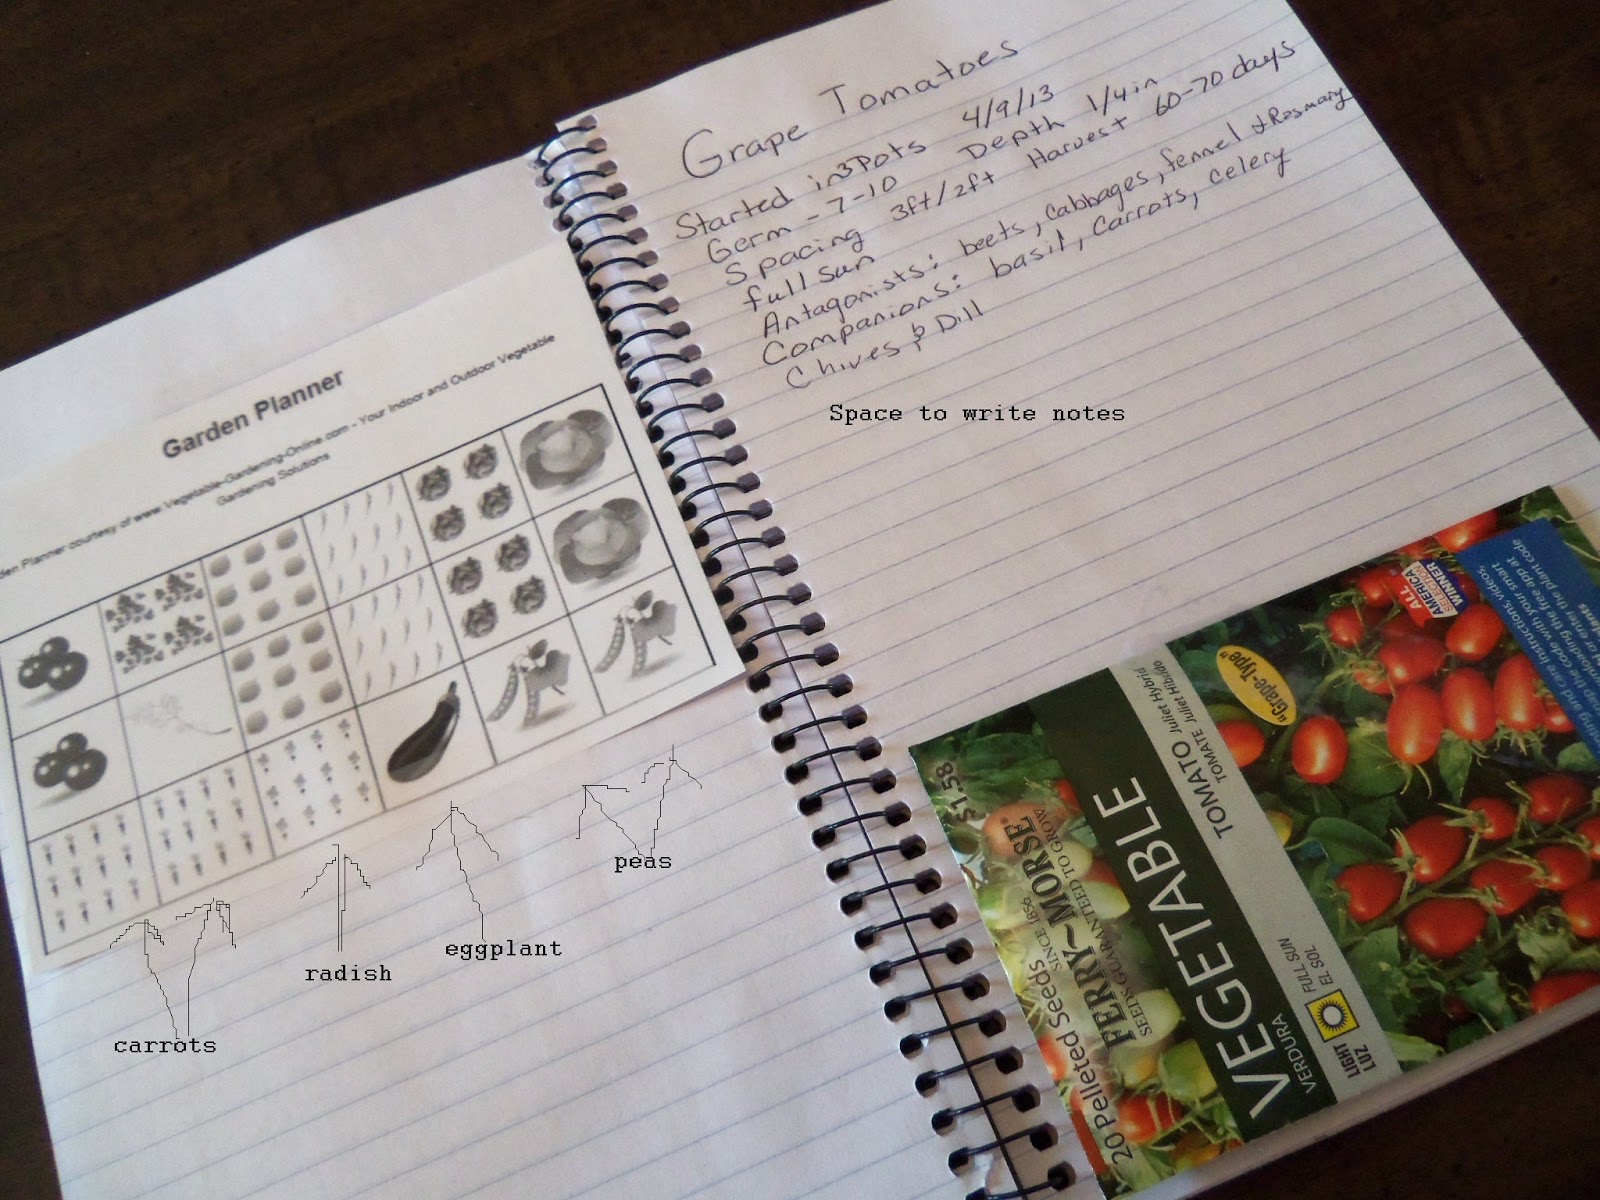
I keep all this information in a loose spiral notebook. This makes it easier when I am in my garden planting I do not have to stop what I am doing and hunt through my gardening books to find this important information.  In my notebook I keep a page for each plant type. 
For Example:
Grape Tomatoes
Started in pots: 4/9/2013      Planted in garden: -------
Germ 7-10 days      Depth 1/4in
Spacing 3ft/2ft         Harvest 60-70 days
Full sun
Antagonists: beets,cabbages, fennel and rosemary.
Companions: basil, carrots, celery, chives and dill.
I attach the seed package to the page. 
As the season goes by I keep notes about the plants. Such as when I fertilize, how well the plants are producing and if the plants get an infestation I record what I used to treat the problem. All of this information will come in handy so I know if I want to purchase this variety of tomatoes next year. It can also help me learn what types of gardening techniques work best.  


Have you planned your garden yet? What are you planning to grow? Do you have a favorite vegetable to grow or eat?

Thursday, April 11, 2013

Starting Vegetable Seeds With Recycled Containers

Even though it's still cold and actually raining like crazy outside at this time. I have been planning my summer vegetable garden. I have been saving lots of food containers for this project. I like to reuse as many plastic containers as possible. I though about buying those nice little gardening posts that degrade in the soil once planted. It would be nice to have such gardening supplies but I am a penny pincher by nature and lets face it reusing and recycling is free.
First collect your supplies.
Spade
Soil
Seeds
Containers
Glue
Pen
Garden Record Notebook
Poke holes in the bottom of your containers. Three to four holes will be sufficient.
Optional step: Glue the container lids to the bottom rim of the container. This should catch excess water.
Now add soil to the containers. I am planting tomatoes in these containers so I added crushed egg shell to the bottom layer of soil. Then I added more soil on top.The egg shell will help prevent blossom end rot on my tomatoes.
Next press seeds into the soil. I pressed three seeds into the soil cups. I will thin and keep the best in the pot until time for planting in my garden.
I labeled each container with seed type and germination rate. If some seeds do  not sprout in time I can quickly add more seeds. 
I used deli containers, fast food containers, vegetable containers that held mushrooms and strawberry containers.  The last container I used was a deli chicken container that I made a little green house for my grandson and his eggplant seeds.

Well folks that's all for today. How are your garden plans coming along? Have you recycled anything lately?